|
Making your own Iron Butt Association "Mud Flap" 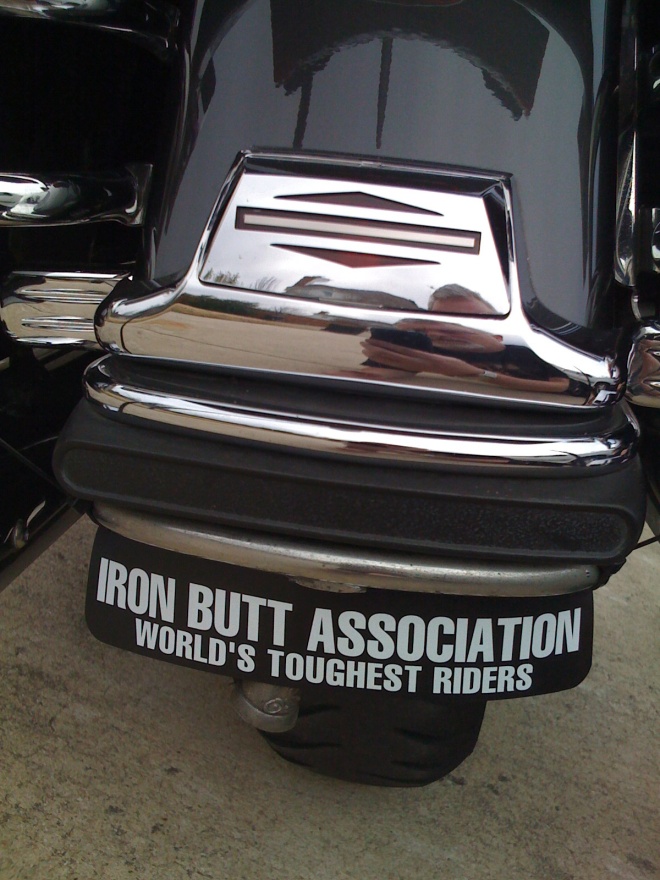 For a Harley Davidson Ultra Classic (2008 and Earlier Models)
by Tim Bradley
For a Harley Davidson Ultra Classic (2008 and Earlier Models)
by Tim Bradley
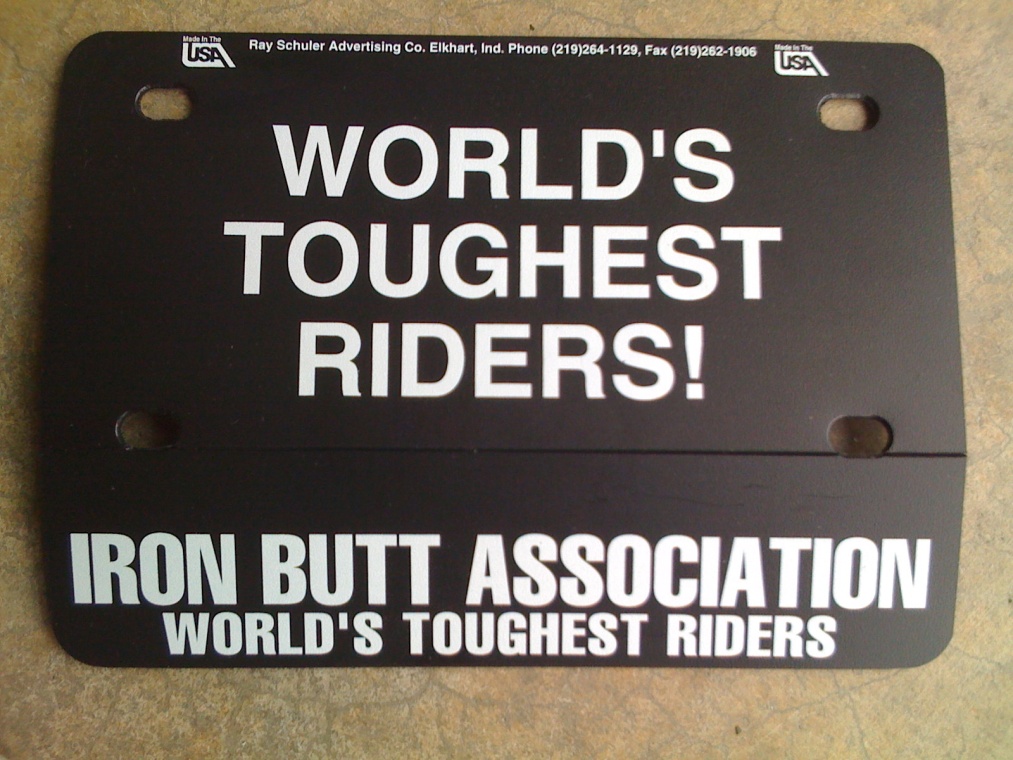
After participating in several "Iron Butt" runs, we finally figured out how to mount our Iron Butt Association License Plate Frames on a Harley-Davidson Ultra Classic so it can be seen. The Iron Butt Association has two versions of the License Plate Frame available, one with "Iron Butt Association" at the top and one with the text at the bottom. Neither one really lends itself well to the Ultra Classic license plate setup. Simple hand tools are all that is required. The following is a list of the tools we used:
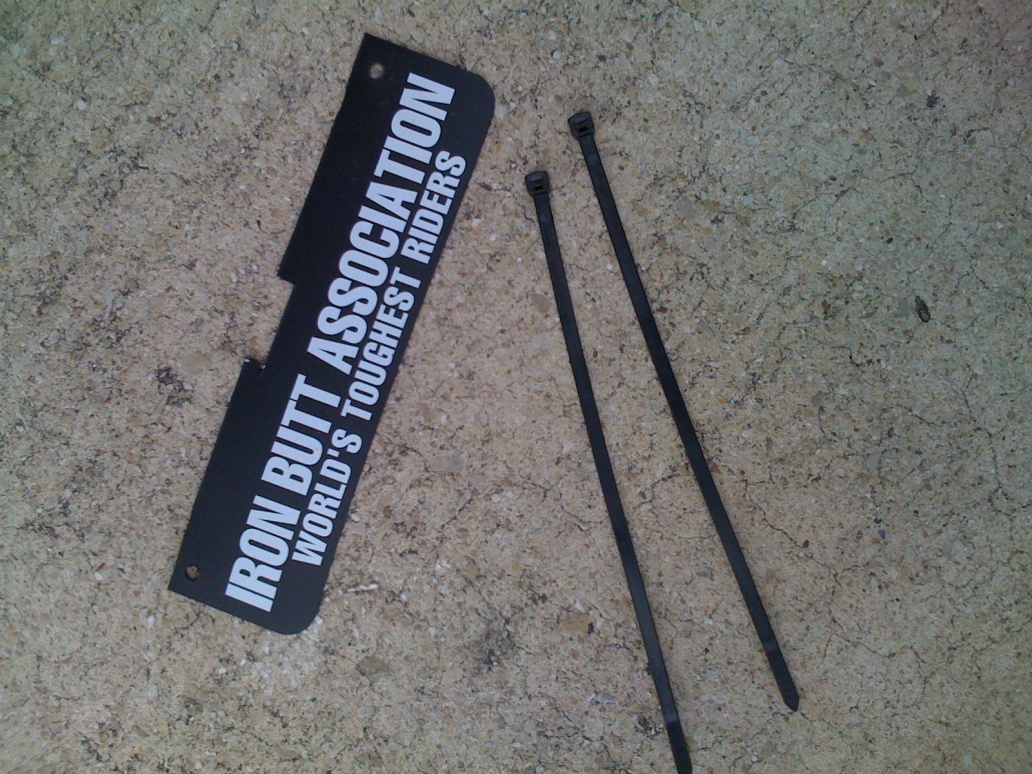
You will also need a couple of plastic zip ties. Start with the license plate frame with the text at the bottom and score it with a razor knife just below the mounting holes (Figure 1).
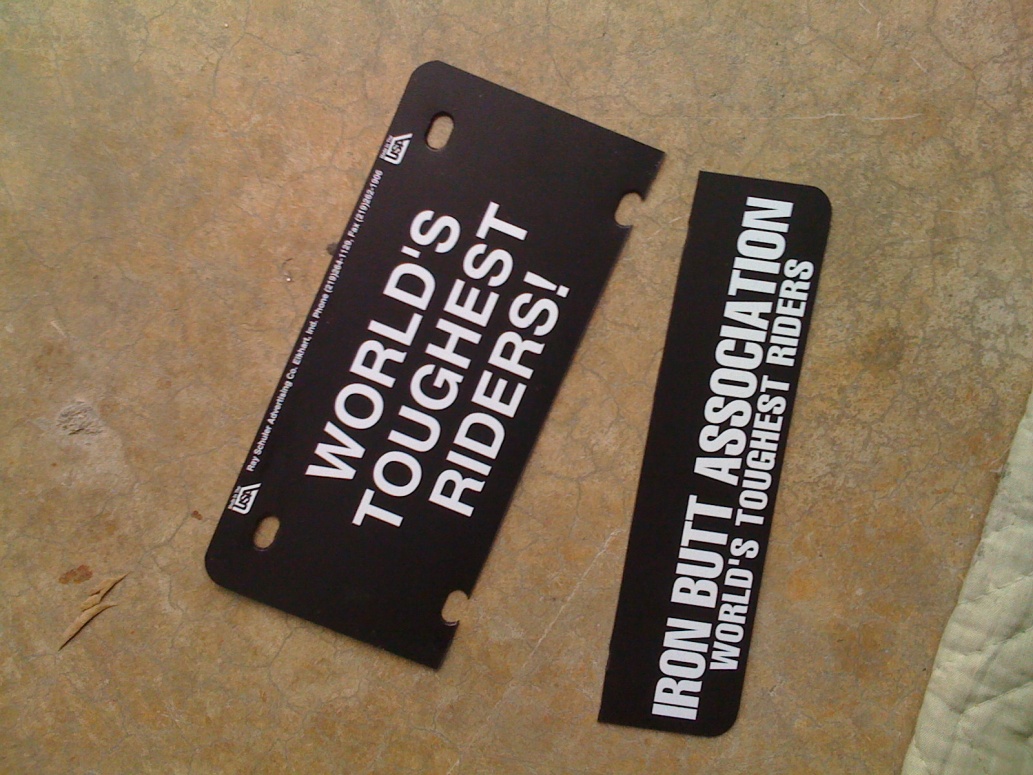
Figure 1 Simply bend the frame along the score line and fold back and forth several times to separate the two parts of the license plate frame (Figure 2).
Figure 2 Discard the larger portion of the license plate frame or find something creative to do with it. You will need to make a small notch to allow for the mounting bracket in the center of the Ultra Classic rear fender rails. Find the center line of the remaining portion of the license plate frame. The total length is 7 ½ inches, the center point is 3 ¾ inches. Make a small mark with your silver Sharpie. The width of the bracket on the chrome fender rails is about an inch wide. Make two additional marks, one about 9/16 of an inch on either side of the center line previously marked (Figure 3).
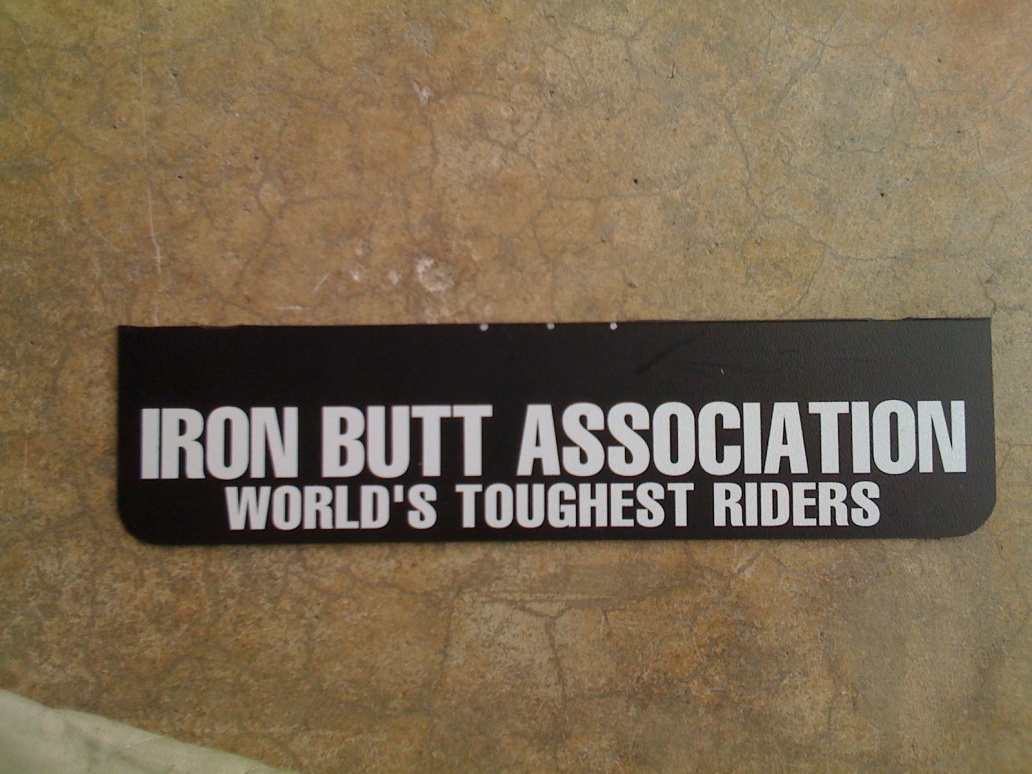
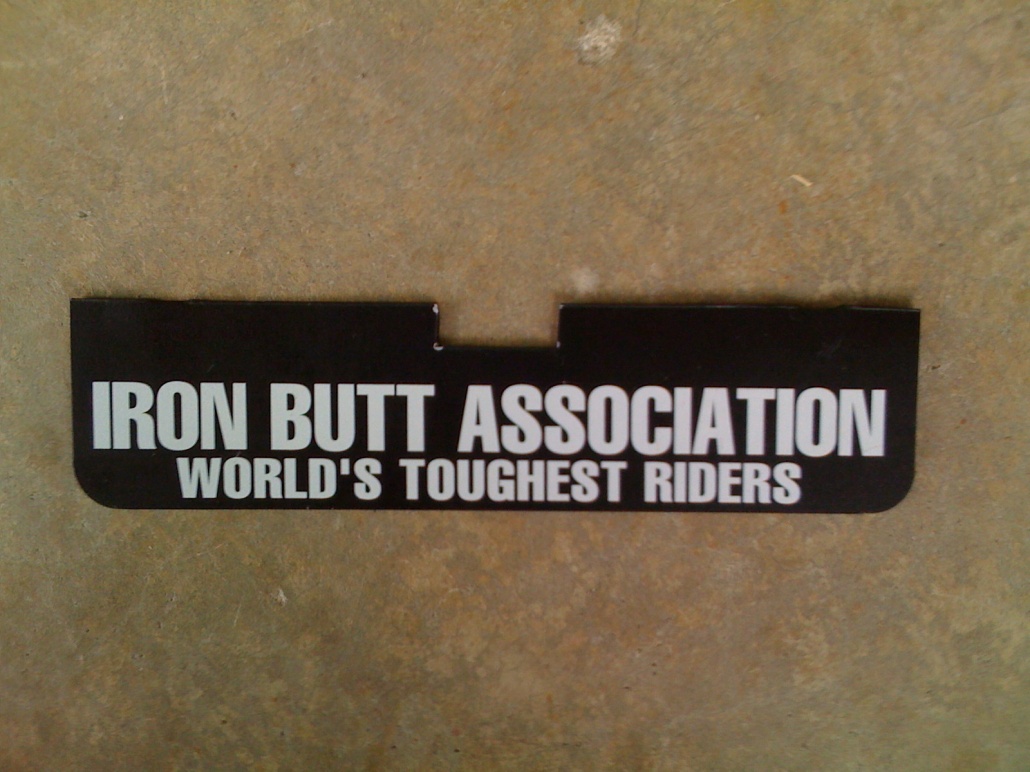
Figure 3 The next step is to cut out the notch needed to fit around the chrome fender rail mounting bracket. We found a notch with a depth of 3/8 to a half inch will work (Figure 4).
Figure 4 Using a hand drill and the 3/16 inch drill bit, drill a hole in both upper corners of the plastic (Figure 5).
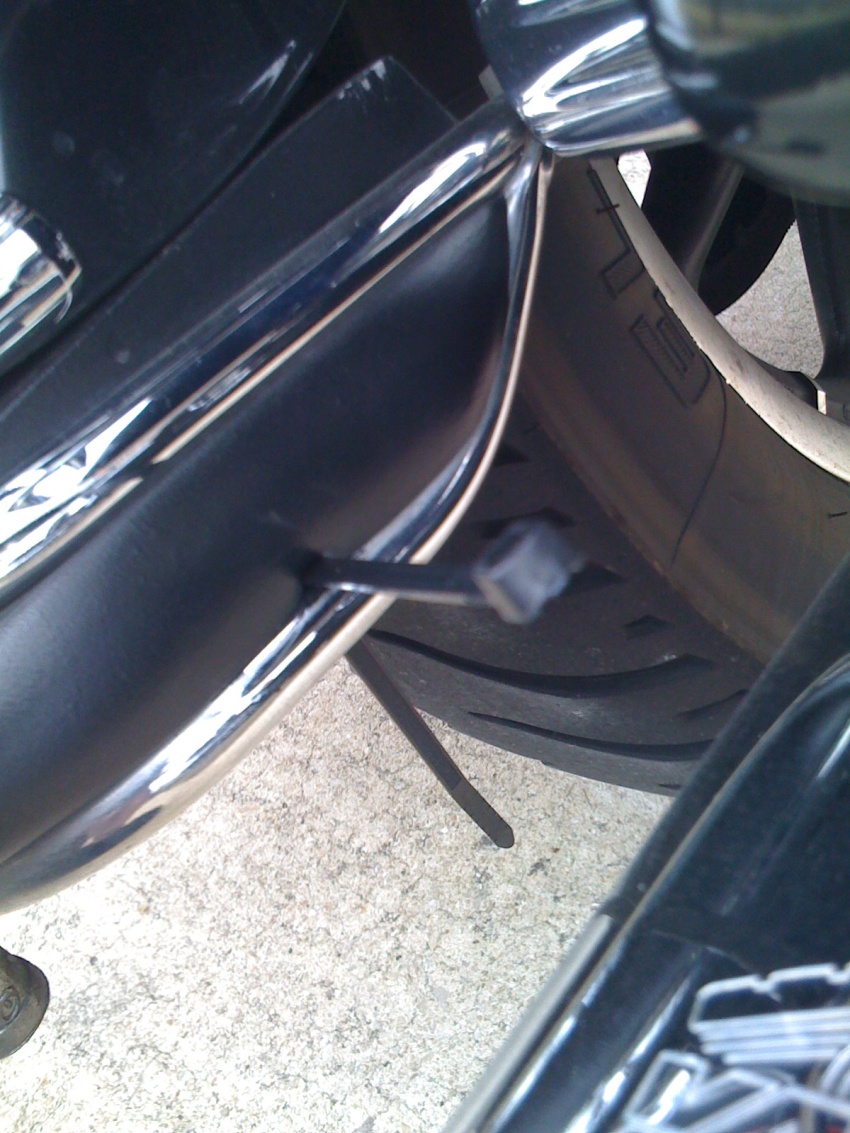
Figure 5 The next step is to mount your Iron Butt Association "Mud Flap". We accomplished this by simply using two plastic zip ties. Slide a plastic zip tie between the rubber bumper insert and the bottom fender rail. You will need to place one on both sides of the fender. Depending on where you drilled your holes, the plastic zip ties should be around 3 ½ inches from the center of the fender rail. No need to be exact, the plastic zip ties slide fairly easily once you have them between the bottom chrome rail and the rubber bumper (Figure6). We found it was easier if the large end of the plastic zip tie was on the high side of the rail.
Figure 6 Dry fit the Iron Butt Association "mud flap" between the back of the chrome fender rail and the rubber bumper, inside the bottom of the fender and align the plastic zip ties with the location of both holes in the "mud flap". After you have determined that everything is aligned where you want them, slide the pointed end of the plastic zip ties through the 3/16 inch holes you drilled, coming from the back side of the "mud flap". Connect both ends of the plastic zip ties together loosely. This is your last chance to make final adjustments. If you are satisfied with where it is, snug down the plastic zip ties, and snip off the extra length of plastic tie. Job well done (Figure 7).
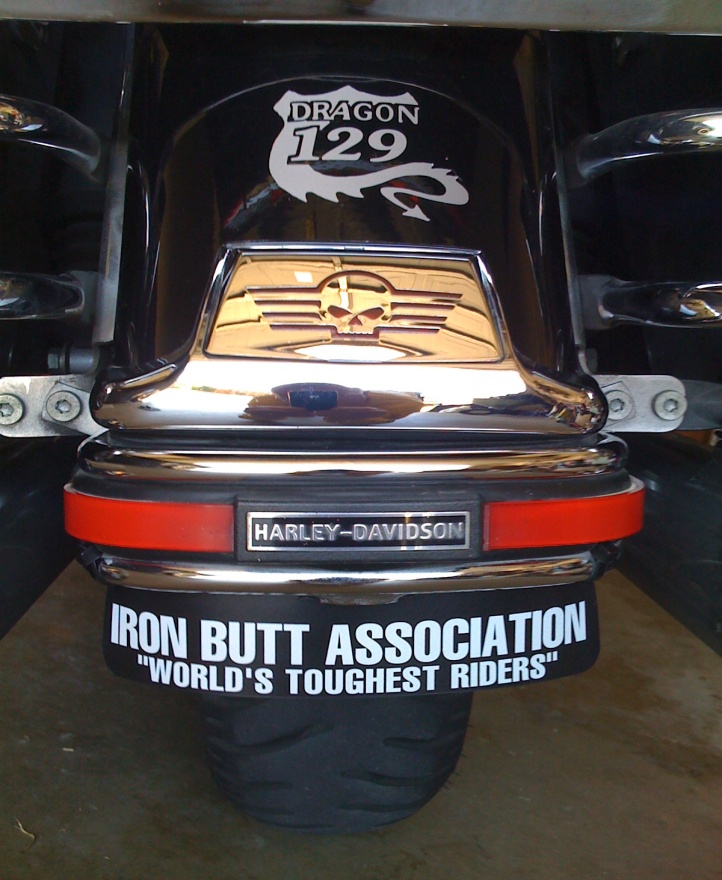
Figure 7 Ride with Pride! |